Wednesday 13 February 2013

Make me vintage!

We have been a little bit silent over here at Aroha Vintage as we decided to take a break over the summer so we could spend some time with our families, but we are back and we have some exciting news..... We are starting a new line called Make me Vintage.

Those of you who have been following us for awhile will know we LOVE vintage (hence the name ;) ) and we LOVE making things so we have decided to marry the two with our make me vintage line. Make me vintage will be a line of fabulous vintage inspired kit sets and we are pretty excited about it!!!!!

 Over the next wee while we will reveal all but for now I thought I would show you a wee sneak peak into one of my favorites!!! THIS is our scrabble tile fridge magnet kit set


I love it on my fridge and it would make the perfect gift for a Vintage lover. Let me show you how its done. everything you need for this is in the kit (except for scissors).


Take out the magnetic sheet and measure it into the right size to fit on the back of your tiles, cut the sheet and then peel off the the white card board and stick the adhesive side of the magnet sheet to the back of your tile..... voila you are done.

super easy and super cute right?

This kit is available over at our facebook store :)


we are bursting at the seams with excitement about our new kits and over the next wee while we will be telling all so keep your eyes out because we know you will love them!!

Aroha nui

Jess


Monday 26 November 2012

Chalkboard Frames


 I was thinking today about the most comman question we get regarding our chalkboard and whiteboard Rolls and wether they will peel the paint off the walls when you remove them....


As some of you may know I have some on my kitchen wall as chore charts for the kiddos  (they still wont do the chores!)


 But I have yet to remove it so can't say for certain that no paint will be harmed. It does say on the instructions that if it is applied to a smooth flat surface it will peel off fine but many of you are not willing to risk the paint job :)

I have seen it applied to many things Fridges, Cupboards (notice the whole cupboard for ashtrays ) and as a table runner for a dinner Party so I thought lets try picture frames .... easy to do and you dont have to risk the paint work.

As I was meandering around the Warehouse today I noticed that there was 25%  off all picture frames and thought to myself that I would give the Chalkboard frame a go so here is a quick, easy and cheap tutorial for a chalkboard frame :)

You will need


  • Frame of any size or description
  • Roll of chalkboard or whiteboard (available here )
  • Scissors


First you need to pull the Frame apart and remove the glass
Like so .....


Lay the glass on the chalkbaord roll and cut a piece of chalkboard slightly larger than the frame you are using. Peel the backing from the chalkboard...(think covering books with duraseal) place the glass onto the sticky side of the chalk roll... press down firmly but taking care not to crack the glass.
Flip the glass over and smooth out all of the air bubbles...
Trim the excess chalk roll from the glass


Pop the glass back into the frame and put it all back together..  and WALAH one super cool frame that you can stick up anywhere with no fear of killing your paint job!!


I decided to use mine as part of my christmas decor and this is what it looks like (excuse the crookedness I free handed it with the smallest piece of chalk you can imagine) and the great thing about this is I can wipe it off and start again!!


 But if you want it to look awesome here is a cool trick I found on the net on how to write awesome fonts on your chalkboards 


Let me know if you try it I would love to see some results! 

Arohanui Lex


Wednesday 8 August 2012

Lets talk about Stamps!

Its been a rainy few days here in Christchurch which I think means a great excuse to craft up a storm. There is nothing better than creating something pretty while the fire is roaring and my tummy (and maybe heart a little too) are being warmed by the tea from one of my vintage tea cups.


For me crafting is such a good creative outlet and part of why I love it is because anyone can do it!!! One of the tools that can help make crafting fun and doable for anyone are stamps! Stamps are such an easy and effective way to amp up any craft project so tonight I thought I would share a few of my favourite stamp crafty secrets.

I love thinking about creative, cost effective, pretty ways to wrap pressies and I think I have come across a winner.
 All you need is:
- brown wrapping paper (which is available from most post shops and is cheap as!)
-Alphabet stamps
-  Coloured bakers twine or ribbon


Wrap the gift in the brown paper, stamp the name of the lucky recipient on the parcel and then wrap the bakers twine or ribbon  in a bow ... so simple right?


By nature I am not the most tidy person (The other vintage girls will testify to this!) So any way to make cute labels that don't involve my childlike scrawl is a bonus for me.These new stamps we have make cards and labels super cute and if you are handwriting challenged like me possible :).


I think stamps make any craft that much more special.


If you are like me and are also a little stamp crazy I would LOVE to hear some of the fab things you do with our stamps so leave a comment :)

Arohanui
Jess


Tuesday 31 July 2012

Fabric tape fun

So I was "busy" Pinning on pintrest last night .....it may or may not have turned into one of those marathon sessions where you completly lose track of time and before you know it its midnight! like I said may or may not have been....anyway I digress

I came across this cool PIN and thought to myself that I could actually do this using our fabric tape

so here is my first tutorial please keep in mind its not my original idea or concept..

You will need :
  •  An old pair of Jeans or shorts
  • Fabric tape I used our Pure Set and a Pink lace tape
  • Scissors
  • Sewing machine
  • Iron

I started with the pink lace tape.. I wanted to hide the orange stitching that was already on the shorts so I placed the tape on this line and used it as my guide. I went right around the hem on both legs... I really couldnt believe how easy this was because the tape is already adhesive I didnt need PINS!! 


 So once that was done I place the "pure" tape on top. Carefully keeping it straight and overlapping the pink lace tape just a little .. As the "pure" tape is quite wide it hung off the bottom of the shorts nicely...


 Once I had stuck the tape on ..(again super easy no pins..) i went carefully around the bottom of the hem folding the "pure" tape into the inside of the leg... a similar effect to Bias Binding.


 They were looking pretty cool but because they were going to be worn and in turn would need to be washed I need to sew the tape onto the shorts. I sewed around the top edge of the "pure" (Being careful to make sure that I was catching the tape on the underside too) The bottom edge of the lace was under the pure that I was sewing. I then sewed across the top of the Lace.

(excuse the staged shot of the iron)
I then ironed the whole thing 
and.....

WALAA!

A super cute pair of shorts for my Miss Marita to rock out in summer!! 

From start to finish this took me all of 15mis it was really quick and super easy! The tape was so easy to work with. I am thinking all my girls jeans and shorts may just get a "makeover"
I may just go Fabric tape CRAZY.

pop over and se our range that we have in our store here We will be adding to this range over the coming weeks.
Make sure you post a picture if you try this out!! 

Much  Love

Lex xx


Wednesday 18 July 2012

Christmas!!!!!

This blog is all about Christmas. "Christmas!" I hear you hear you splutter, we are only half way through the year! I have at least 4 more months before I have to think about that!

I suppose I am considered one of those "Christmasy" people - I love Christmas and all things (tastefully) related. I didn't really stand a chance to be honest as I have come from a Christmas obsessed?? family. From the time I was a young teenager our house was entirely decorated on the bottom floor (living room, lounge, conservatory, entrance way, hallway, and yes, even the kitchen), and open to the public to come and see. Many weekends my brother and I would get up late on Saturday morning and go down to breakfast only to be greeted by numerous strangers roaming about our house. Toasters, butter, spreads and cutlery then had to be stealthily smuggled upstairs and breakfast would be "enjoyed" on the floor of our parents room. Despite all this we actually all love it and enjoy opening our home up for others to come and see.


Its a family effort and everyone pitches in. We have our different set jobs each year. I am the chief Christmas tree decorator - which is no mean feat as we have 5 themed trees that need decorating - the tallest being 10foot! Even our kids have become involved and they thoroughly love crawling into the attic space and getting all the decorations out and running them up and down the 2 flights of stairs for us.  

I was talking to my Nana the other day and she said that she was making all her Christmas cards. I was surprised, but she said that she makes them every year in the winter when its all cold and crafting in front of the fire is the best thing you can do. I had to agree - all this cold weather and being cosy inside definitely makes me want to do crafty things to while away the evenings. So I thought I would have a look at all our Christmasy products and share them with everyone in case there are other like-minded crafters out here who are already on the Christmas train.  


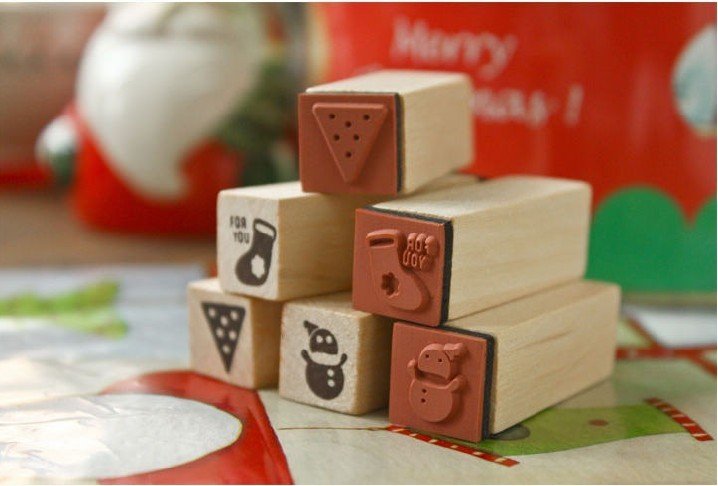
These little stamp sets are super cute. Great for card making or scrapbooking. They come in a set of 8.


This is our new "Red Ribbon"  range of fabric fat quarters and fabric tape. They are the perfect Christmas colour combo and will make stunning decorations and crafts.


This mini Christmas bunting is made using our red gingham fabric tape. It sits perfectly along the top and just sticks together. You could even get away with no-sewing bunting if you wanted!


And of course you can't go past red and white twine for EVERYTHING Christmas. I have used so much of this on decorations, wrapping, tying, hanging... just about anything I can.
(Just so I don't scare you too much, I will wait until slightly closer to Christmas to show you how to make a stunning wee decoration using this twine.)


Until then, happy mid winter Christmas and happy crafting!
Leanne xoxo


Wednesday 11 July 2012

Celebrations!!

It has been a week packed full of fun and laughter in my world as my family has been in celebration mode! The baby of my family had her 21st Birthday party(more like a banquet than a party really) last night which meant my lovely family spent the week crafting and cooking up a storm!I volunteered to do the dessert which for 26 people is no small feat! ( I realized this once I got started).

As I am sure you know if you follow us on facebook I love all things vintage which of course meant I had to add a bit of vintage flair to the dessert table. I decided some DIY bunting for the cake and cute wee flags for the cupcakes would be a perfect match for her enchanted forest theme! They are so so easy to make and make things that much more fab! All you need to do them is a masking sticker set,(I used pastel because it went with her theme) some tooth picks,2 sqewers and some twine. To make the flags just take a strip of masking sticker, these are pre-cut already which is handy. Fold it over the top of a toothpick pressing both the adhesive sides together. You can either leave it like that or cut a small triangle in the end to make it look more like a flag.


To make the bunting cut the twine length you would like, fold a strip of masking sticker over your twine,press both the adhesive sides together, then alternate between cutting a triangle in the strip and cutting the strip into a triangle. Wrap the twine around a skewer and you are done! So easy and super cute.


The night was a wonderful celebration of my little sister who I am so proud of and I'm pleased to report the dessert was a success.

My older sister (right) and I (left) in our enchanted forest masks
Aroha Nui Jess

Tuesday 26 June 2012

And The Winner is.....

So Tuesday was our 1st Birthday!

We decided to celebrate in Style and were lucky enough to attend the Shop Me Pretty Market out in West Melton. What an awesome event and fantastic turnout! it was so well supported by the community.. If you haven't had the privilege of  attending one of these they, are markets held in the evening once a month, a gold coin entry fee gives you a glass of bubbles/juice and you get to shop in style. Make sure you sign up to their Facebook page to keep up with when and where the next ones are!

Our stand at Shop Me Pretty


And in Birthday Shenanigan News...

We were so  humbled by all your lovely comments here on the blog about how much you love our stuff and this competition was really just to say a huge thank you to you all for all of your support over the past year! We are super excited to see what the future has in store for Aroha Vintage!


And now onto the news you are all wanting!!  Who is the winner of this Fantastic Prize Pack .....


EMMA WARD


Congratulations!!! We will be in Contact to get your awesome Prize out to you!  

Arohanui

Lex, Jess & Lee